 Online documentation - Websydian v6.5 Online documentation - Websydian v6.5
|
Packaging the Servlet Based Websydian Web Server Component
This document describes the steps to complete in order to
successfully package a servlet based Websydian Web Server Component
for deployment on a number of servlet engines like Tomcat,
WebSphere or ServletExec.
Go to our web site www.websydian.com and download the
Websydian Web Server Component packaging tool from the Download
section. You are required to login using your Websydian user
profile.
Unpack the Pack.zip file to your choice of directory.
Welcome dialog
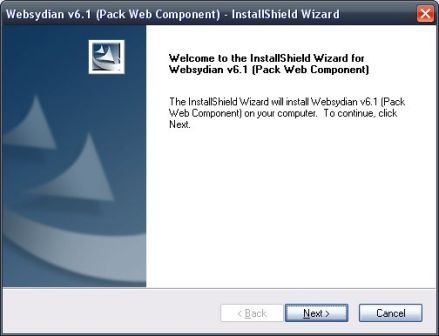
Press the 'Next' button
Select type of Websydian component to package
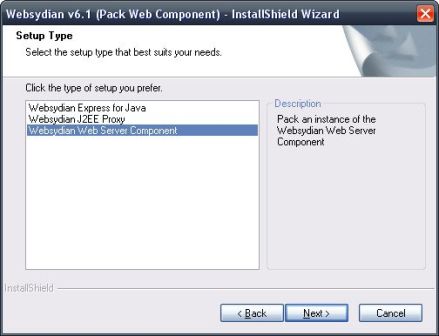
Select the 'Websydian Web Server Component' and press the 'Next'
button.
Choose the destination location where the package will be
stored
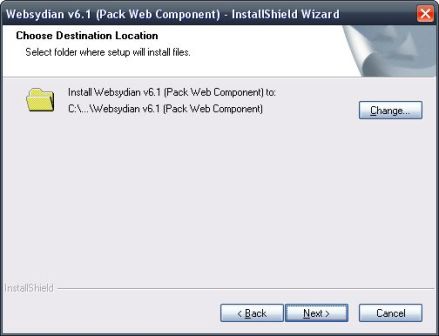
Press the 'Next' button to select the proposed location or press
the 'Change' button to choose alternate location and press
'Next'.
Set servlet engine and servlet information
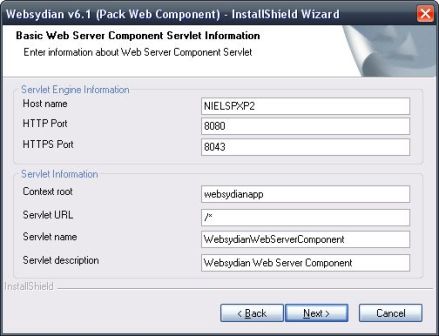
Specify the following information and press the 'Next'
button.
- Host name, the host name of the web server that is to run the
Websydian Web Server Component. Will default to the host name of
the system running the packaging tool.
- HTTP Port, informative information on what port is used by the
web server for servicing standard web requests. Will default to
8080.
- HTTPS Port, informative information on what port is used
by the web server for servicing secure web requests. Will default
to 8043.
- Context root, the first part of your URL (e.g. http://www.websydian.com/express30/site/demosite
the express30 will be the context root). This is used as the name
of the WAR file being created.
- Servlet URL, the second part of the URL that will be used to
identify this Web Server Component within the above context root.
Specifying /* indicates that all URL sent to the above context root
will be handled by this Web Server Component. If you specify e.g.
/site/* all requests with context root followed by /site will be
handled by the Web Server Component.
- Servlet name, an identifier for the servlet engine to host this
Web Server Component.
- Servlet description, a description for the Web Server
Component, often shown in the administration interface of the
servlet engine used.
Specify information about Websydian Server
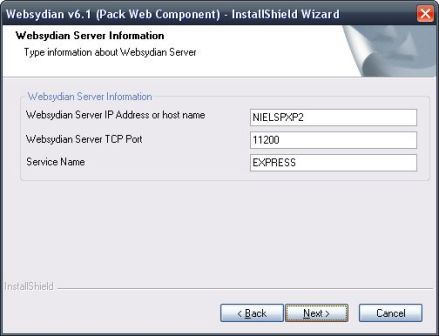
Enter information about the Websydian Server that will be used
by the Websydian Web Server Component and press the 'Next'
button.
- Websydian Server IP Address or host name, this is the host name
or ip address of the system running the Websydian Server
- Websydian Server TCP Port, the port as specified when starting
the Websydian Server
- Service Name, indicates what service name this Web Server
Component is to be servicing as supplied when start the Websydian
Application Services.
Specify information about the Web Server Component
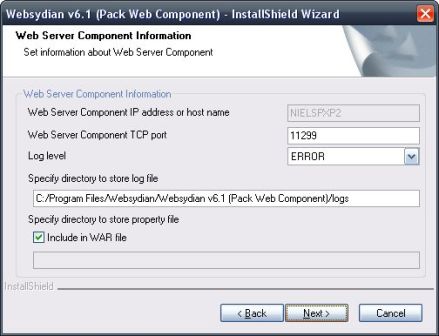
Enter information about the Web Server Component and press the
'Next' button.
- Web Server Component IP address or host name, automatically
taken from the servlet engine information dialog.
- Web Server Component TCP port, indicates the TCP port to be
used by the Websydian Web Server Component for handling service
requests like suspend, activate etc.
- Log level, indicates the log level used by the Websydian Web
Server Component.
- Specify directory to store log file, specifies where you would
like to place log files created by the Websydian Web Server
Component. Note this directory is to be created on the web server
hosting the Web Server Component.
- Specify directory to store property file, location of the
Websydian Web Server Component property file. Normally you will
just keep the property file as part of the WAR file and not specify
a location.
Set optional developer information
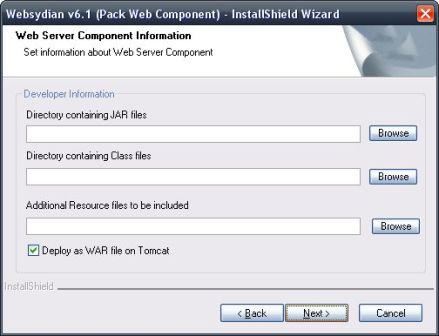
Optional enter information about the advanced settings for
developers or deployment, and press the 'Next' button.
- Directory containing JAR files, an optional directory can be
supplied for copying additional jar files to the Websydian Web
Server Component WAR file.
- Directory containing Class files, an optional directory can be
supplied for copying additional class files to the Websydian Web
Server Component WAR file.
- Additional Resource files to be included, an optional directory
holding resources like images, css files, etc. that you would like
to include with the WAR file in the root.
- Deploy as WAR file on Tomcat, an option to allow the automatic
deployment to the local Tomcat to only copy the structure and not
the WAR file to the Tomcat webapps directory.
Finalize the packaging of the Websydian Web Server
Component
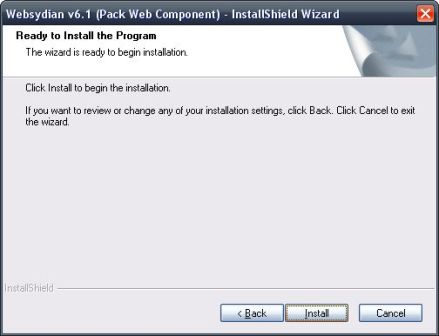
Press the 'Install' button to start packaging the Websydian Web
Server Component.
If the supplied host name and host name of the local system
corresponds and at the same time you have an Apache Tomcat
installed the packaging tool will prompt you for deploying the
Websydian Web Server Component directly to the local Apache Tomcat
instance. If you answer yes deployment will be performed
automatically and your Websydian Web Server Component is ready for
service when starting the Apache Tomcat servlet engine.
If you did not get a dialog on automatically deploying the
Websydian Web Server Component it is ready for deployment in the
supplied directory and will have the file extension WAR and
filename will be the context root as specified. Now follow the
instructions supplied by your servlet engine vendor for deploying
web applications (WAR files).
