|
|
This tutorial will show the steps necessary to make a simple business process.
The process accesses a product database and will return a list of the 5 best selling products for each group of product.
To keep the function fetching the data simple for this tutorial, the data are fetched from a file containing all of the relevant data.
A generic description of how to create a business process is available here.
In order to complete the tutorial you must make sure that the following is in place:
You can find guidelines on how to install WebsydianExpress here.
It is assumed that you install the Windows version of WebsydianExpress. If you use WebsydianExpress on another platform, then you must make the necessary adjustments to the guidelines in the deployment section of the tutorial.
Start by downloading a local model containing the database and abstract functions.
Once the local model is downloaded you should setup your development environment. You can find guidelines on how to do this here. Please note that in the step "Create Local Model" you should not create a new local model as you have downloaded one. However, you still have to set the model configuration as described in this section.
In addition to this you must also setup a database for the local model. Please consult the Plex help on how to do this.
A ProcessEntryPoint function needs to be defined for each business process. This function will always be called as the very first step when activating a business process. This means you can use this as an initialization function for the process.
The implementation name of the ProcessEntryPoint function will be used to uniquely identify the process to WebsydianExpress.
| Source Object | Verb | Target Object |
|---|---|---|
| ItemSalesList | is a FNC | _Abstract.ProcessEntryPoint |
| ItemSalesList | implement SYS | Yes |
| ItemSalesList | impl name NME | TOPLIST |
| ItemSalesList | file name NME | TOPLIST |
The business process is all about showing a list of products in a grid. A PageGenerator needs to be defined to be able to generate the HTML page.
The implementation name of the PageGenerator will also be used as the name of the HTML template used by the PageGenerator.
| Source Object | Verb | Target Object |
|---|---|---|
| ItemSalesList | includes FNC | ShowList |
| ItemSalesList.ShowList | is a FNC | _Abstract.GridPageForProcess |
| ItemSalesList.ShowList | implement SYS | Yes |
| ItemSalesList.ShowList | file name NME | ITEMSALE |
| ItemSalesList.ShowList | impl name NME | ITEMSALE |
| ItemSalesList.ShowList. _DocumentTemplateGenerator |
implement SYS | Yes |
In the tutorial the PageGenerator used by the process is scoped under the ProcessEntryPoint. You do not have to do this - we just find it convenient to have all the functions used by a process scoped together.
Defining the PageGenerator as a GridPageForProcess specifies that the page generated will contain a grid.
A generic description of how to define a grid on a page can be found here.
To make the PageGenerator fetch the sales data, replace the abstract view and function for the PageGenerator.
| Source Object | Verb | Target Object |
|---|---|---|
| ItemSalesList.ShowList | replaces VW | UIBASIC/UIBasic.Grid |
| ...by VW | DataBase.Sales Statistics.BySales | |
| ItemSalesList.ShowList | replaces FNC | UIBASIC/UIBasic.Grid.BlockFetch |
| ...by FNC | DataBase.Sales Statistics.BySales.FetchTop5Items |
As the user must be able to see the top 5 items for each item group, he needs to be able to change which group to show data for. To make such an action possible it is necessary to define an EventHandler for the page.
| Source Object | Verb | Target Object |
|---|---|---|
| ItemSalesList.ShowList | includes FNC | ChangeGroup |
| ItemSalesList.ShowList.ChangeGroup | is a FNC | _Abstract.EventHandlerForProcess |
| implement SYS | Yes | |
| local FLD
...for VAR |
Item Group ID | |
| WSYBASE/WebInput | ||
| ItemSalesList.ShowList.ChangeGroup.IdentifyInputFields | implement SYS | Yes |
| ItemSalesList.ShowList. _DocumentTemplateGenerator.ChangeGroup |
implement SYS | No |
| ItemSalesList.ShowList._DocumentTemplateGenerator.ChangeGroup.IdentifyInputFields | implement SYS | No |
The ProcessEntryPoint and the EventHandler must of course call the PageGenerator. This is done by inserting the calls in the action diagrams of the functions.
Post point "Call to first PageGenerator":
Call ItemSalesList.ShowList
// Map <Item Group ID.*Blank>
// Map <Sales Total.*Zero>
Post Point "0 call to build of document":
Call Function: ItemSalesList.ShowList
//Map WebInput<Item Group ID>
//Map <Sales Total.*Zero>
You must now generate and build the business process as well as the functions and database objects used.
Generate and build the following objects and their scoped objects as well:
Run the DocumentTemplateGenerator function ItemSalesList.ShowList._DocumentTemplateGenerator. This will generate the HTML template used by the PageGenerator function ItemSalesList.ShowList. The location of the template was defined during setup of the local model.
Execute the function DataBase.Sales Statistics.Edit and insert some records in the database. These data will be used later by the business process.
As we only want to show the top 5 items, the following text is inserted in the template:
<!--/(ROWS-5)-->
You should insert this just before the first location of the "<!--/(Grid)-->" marker in the template.
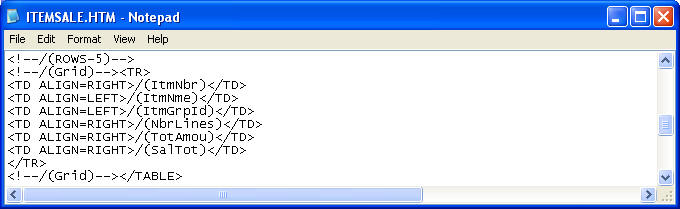
This is one of the special replacement markers supported by WebsydianExpress. It specifies the number of rows to show in the grid.
You can read more about the special ROWS replacement marker here.
Copy the following objects from the development environment to the WebsydianExpress environment.
For more information on how to deploy a business process please read Move Process to Test Environment.
To make it possible to test the functionality it is necessary to define the created process in the WebsydianExpress administration interface. Start the WebsydianExpress demo site and login as administrator on the demo site.
Verify that the setting "Library for created events" is set to the path of the folder PlaceObjectsHere used in the previous section.
Press "Insert". On the next page enter:
Name: Show sales list
Program name: TOPLIST
Description: Shows top 5 items in an item group
Keep the "Create default presentation" check box checked.
Press Insert.
You can find further information about maintaining content loaders here.
Expand the element "Main Frameset".
Select the menu "MENU Menu Loader", which is a direct child of the element "Main Frameset". Press "Add".
On the page shown select "Business Process" and "Create new site element".
Press "Next".
On the page enter "toplist" in the search field and press find.
Select the presentation "Show sales list" in the grid by pressing "Select".
On the next page press "Finish".
On the page shown, enter:
Menu item text: Top Item
Alignment: Left
Sequence: 9000
Display in frame: MAIN
Press "Next".
On the page shown select the roles User and Administrator for the created business process.
Press "Finish".
You can find more information about inserting a business process here.
Return to the start page for the site (or reenter the start URL for the site).
The Menu point "Top Items" should now be shown in the left part of the menu.
Press this menu point.
After testing the function, you can continue to an extension of the tutorial, showing how to change the input field to a drop down box. The extension can be found here.